Step by step:
1. Create brick work pattern with rollers, starting from just in front of the ears, around the crown of the head. Push ends round with a pintail comb to make the ends curl. Push the hair forwards while putting the roller in so that it lies on the section of hair and not in any partings.
2. Once each roller is down and tight, secure them by pushing the flat end of the pin against the head, over the roller.
3. Stop putting the brick work in lines when you get to the bump on the back of the head, put a line of rollers down the back of the head only.
4. Put the rollers in vertically, with the hair curling towards to the face, either side of the line of rollers on the back of the head. Put the blue rollers in the bottom of the hair if necessary.
5. Curl the section just above the ears facing towards the face and curl the section in front and slightly above the ears forwards too, both vertically.
Put the top section of hair in the parting that you want (most commonly side parting) and put the rollers in, rolling the hair away from the parting.
6. Let the hair cool fully and then take the rollers out.
7. Brush the hair on top of each section and below to make it as smooth as possible. Keep gathering more hair together and smoothing the hair out to create soft waves and a curve round the face.
8. Use your fingers to smooth out any static hair caused by brushing it out too much.
9. Back comb the hair slightly underneath to give it more volume, but keep the top layer very smooth.
I was really happy with how the hair came out; however one side of my hair style was a lot curlier and more manageable than the other and I think this was because I didn’t let the less curly side cool down enough and therefore the hair didn’t set into the curls properly. I would definitely make sure to let the hair fully cool down and set before using rollers again. I really like the shape that was created around the face and the curl on the right side of her face because it is very defined, but still soft. I also really like how the back combing gave the hair some lift.
Step by step: 1. Cleanse and moisturise the face to make sure it is clean and ready for makeup application.
2. Brush through the eye brows and add a light brown colour to the sparse areas with an angled brush.
3. Apply concealer under the eye brows with a lip brush.
4. Apply some eye shadow primer all over the eye lids and along the lower lash line.
5. Set the primer with some translucent powder to make eye shadow on top easier to blend.
6. Apply some light blue eye shadow all over the kids and blend it into the crease with a fluffy brush.
7. Add some darker blue into the crease with a fluffy crease brush. Keep adding this colour until you get the desired intensity.
8. Add some white eye shadow along the brow bone with a pencil brush.
9. Apply some dark purple along the upper lash line and wing it out at the corners with a small detail brush.
10. Apply the model’s bright blue contacts.
11. Apply white supra colour along the lower lash line and in the water line with a small detail brush.
12. Set the white supra colour with white eye shadow.
13. Apply some dark purple eye shadow in a line below the White supra colour to act as a new lower lash line. Do this with a detail brush.
14. Apply some pink eyeshadow under neath the purple to blend it out with a pencil brush.
15. Apply some mascara to the top eye lashes only.
16. Apply some fake eye lashes to the upper lash line and apply some lower fake lashes along the purple line under under her eyes. Use duo lash glue and tweezers for easier application.
17. Apply some foundation all over her face, blending it down the beck and onto the ears, with a damp beauty blender.
18. Apply some lighter concealer under the eyes in a triangle shape, in the centre of the forehead, down the nose, on the Cupid’s bow and on the chin.
19. Blend this concealer out with a fluffy brush.
20. Apply a thick layer of loose translucent powder under the eyes with a beauty blender to set the makeup.
21. Apply powder all over the rest of th face with a kabuki brush, then brush away the excess powder under the eyes with a fluffy brush.
22. Apply some bright pink blush to the apples of the cheeks, in a circular shape, with a dense blush brush.
23. Apply some highlighter to the tops of her cheek bones, on the centre of the forehead, down the nose and on the Cupid’s bow with a highlighter brush.
24. Add some glitter glue to the tops of the cheek bones and then dab some glitter over the top.
25. Using a cocktail stick, gently dot brown supra colour over her nose to look like freckles.
26. Use a dark pink lip liner to outline where you want the outline of the lips to be. I made these the same height but a lot narrower.
27. Use a lip brush to fill the lip liner in with a baby pink lip stick.
Step by step: 1. Section off an inch of hair above both ears, going backwards.
2. Plait these two sections into French plaits and continue to a normal plait when the French plait ends, about two inches behind the ear.
3. Back comb the middle section in strips of hair, from front to back. Continue to do this until you reach the crown of the head.
4. Lightly brush the very top layer of hair and smooth and shape it into a big bee hive. Secure the back of this bee hive with hair grips.
5. Curl the back section of her hair with small curling tongs. Apply hair spray to the curls to set them in place.
6. Wrap the two plaits over each other towards the middle, to frame the bottom of the bee hive. Secure the plaits with hair grips.
7. Add a white flower to the centre of the back plaits for decoration, but also to hide the hair grips securing the back of the bee hive and plaits.
8. Apply some small flowers randomly all over the bee hive and hair spray them in position.
Ask the model to change into her blue night dress. I asked the model to keep wearing her necklace as I felt it added to the pretty and girly look.
I was so happy with how my model’s makeup, hair and outfit all came together! I love how using the blue contacts and the technique of giving her a new lower lash line has made her eyes look a lot bigger and more doll-like. I used very full eyelashes so that the eyes really stood out and didn’t get lost in the dark lighting. I really like how the lips are so bright and how I have made them look more narrow and therefore more doll-like and pouty. The glue I used on the cheeks made the foundation underneath look a bit darker which I didn’t like; however when the light is on the glitter you can’t see the darker glue as the glitter shines so brightly. I think the hair looks really pretty and extravagant and girly, with the pretty flowers and feminine curls. The back combed bee hive isn’t exactly even. I said in my hair chart that I didn’t want the hair to look really neat; however I don’t think I like how each side of the bee hive aren’t even as it just looks like a mistake. If I film this again, I may rectify this and, instead, add more fly aways to give it a messy look. I was really happy with how the nightie looked because the blue colour linked in with her blue eyeshadow and blue eye contacts and the flowy material and white lace made it looks very girly, pretty and youthful.
I showed my photography teacher, Chris, my film footage and he said he really liked the atmosphere that was created and the lighting; however he agreed that the quality of the footage could be improved to give it a more professional look. He suggested using big artificial lights but he said that I wouldn’t be able to take them into a forrest because they would need a power source. He therefore suggested that I either changed my film setting to somewhere inside with a power socket, or I should film it in someone’s garden and then use a really long extension lead to get the power into the garden. Thankfully I have a wood surrounding my garden at home so I would be able to use that to give a ‘deep in the forrest’ feel. He said that I should use these external lights and then use a gold reflector to give the warm, candle lit, look. He said that I could move the reflector slightly, very quickly, to give the same flickering effect as a candle would.
Another thing he suggested using was a DSLR fluid head tripod to make my filming a lot smoother. This would mean that I would be able to move the camera up and down, or side to side, without it being shaky or uneven, giving a more professional look.
I decided to experiment with filming in my chosen location with Girl 1, as I had already designed her full look. After researching how to shoot my film, I decided to use my iPhone torch and a silver reflector, to represent the moonlight, to light up my subject. I will also experiment with using a candle as a light source.
My Model’s Look
My Model Acting Inspiration I showed my model the gif below from Jurassic Park (1993) of actress Ariana Richards in the famous scene where she has just spotted a massive dinosaur’s shadow approaching them and she is holding a spoon of jelly that is shaking. The girl in the film was so terrified that she couldn’t move so she just starred into the distance, with her eyes wide open, and stayed very still. This is what I asked my model to do in my film; however she found it difficult to do as she hadn’t had any acting training before. I tried to help by showing her what I would do if I was the model, which I think helped, and overall I am happy with the footage I got. Both my other model have had acting and dance training so I am more confident that they will perform their parts confidently.
BREWINGCUPPA, 2015. 17 Facts About Jurassic Park That You Don’t Know. In: Brewing Cuppa. 12 June 2015 [29 October 2015]. Available from: https://brewingcuppa.wordpress.com/2015/06/12/17-facts-about-jurassic-park-that-you-dont-know/
The Filming
I couldn’t upload the actual video footage to my blog, so I took some screenshots of my footage to show how the images came out.
Lighting Set Up 1
The images above show how the lighting came out when I shined my iPhone torch onto a silver reflector so that it bounced off and hit my model. This light was brighter the closer the light and reflector were to the model; however the quality of the image was still not great and had noise. I asked my assistant to shake the torch very quickly to give a flickering effect as I wanted to make it look like either the trees above were causing the moonlight to flicker or she was being light up by candle light. I think this effect worked really well and I think it adds a spookier feel. I like that the silver reflector made the image look very cool because it made the scene look colder and more lonely. I am happy with the lighting, but I really want it to look more professional, with a clearer image.
Lighting Set Up 2
I used only a candle as a light source for these shots. I love how the candle creates a natural flickering of light because it makes it look very spooky and eery. The candle makes the scene very warm which give it more of a cosy feel, which I’m not sure I like; however it could also show that she is so cold that she is using the candle for warmth. The close-up shots are better quality than the shots further away because the light is so much closer to the face. However when the candle is further away from the model, there is some noise and fuzziness which I think adds to the eeriness. I think it looks so effective when the candle is shown because it looks so magical and it glows so brightly with a diffused halo of light. I will definitely experiment with using a candle for the rest of my film as it adds a spooky look, but I think I also need to add artificial light to make it have better quality.
I will talk to my photography teacher to discuss ways in which I can improve the quality of my film so that I can have the same lighting effect, but just with less noise and fuzziness.
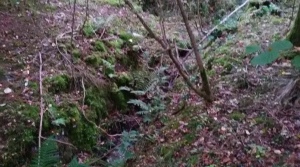
I chose to use a forrest as my location because it is somewhere where it is very secluded and hidden and the branches of the trees and leaves could make interesting and creepy patterns and silhouettes. I think that a lot of people would be intimidated and scared of going into a forrest at night so it is the perfect location to play with the viewer’s fears.
From a very young age the forest has been planted in people’e heads as a dangerous place to go and visit, especially in the dark, as it is commonly described as ‘the deep, dark woods’. It has been portrayed as a scary place in children’s fairytales like Red Riding Hood, Hansel and Gretel and children’s film such as Harry Potter.
The setting of a forest has continued to be used in many horror films such as The Cabin in the Woods, the Human Centapeed and The Evil Dead. Peter Hutchings, who is a professor of film studies at Northumbria University and who specialises in the horror genre, talked to TheGardian about the use of forests in film and said “In The Blair Witch Project, for example, the forest is used to excellent effect. It’s a landscape of increasing disorientation where modern gadgets such as mobile phones fail to work. It’s also a place that forces you to experience the full darkness of the night”. The film, The Blair Witch Project is about three film students who go deep in a forest to film a documentary on the blair witch legend; however only there footage remained. SALIBA, A., 2010. The Blair Witch Project. In: The Horror Movies Blog. 20 November 2010 [29 October 2015]. Available from: http://thehorrormoviesblog.com/2010/11/20/the-blair-witch-project/
I went to my location and took some photos to give me inspiration for my shoot.
The model I am using has naturally light brown hair which I don’t think will look dramatic or dark enough for the character I want to create. I will therefore use a wig to give my model straight black hair. The majority of dolls I researched had very harsh fringe cut in so I want that look too. This will also make her face look more round and therefore more doll-like. VAN SLYKE, R., 2014. Halloween. In: Pinterest. 2014 [29 October 2015]. Available from: https://www.pinterest.com/pin/355995545519099387/
These are the two images I am using for hair inspiration. I was inspired by the very harsh and straight fringe on the girl on the left because I think it almost adds a cartoon, fake feature to the look and it will make her face look rounder. The model’s hair is curled in this photo which I think looks pretty, however I think I will make my model’s hair pin straight to give a more harsh and severe look. I am then taking inspiration from the girl on the right because I love her oversized bow! I really like how it has been kept very gothic and grungy with the black colour and sharp studs, but how the bow shape is very doll-like. I will definitely look into using one of these for my character’s hair. If I use a black wig on my model, I will have to make her eyebrows look a lot darker and more defined to balance it out.
I came across this image of a girl wearing very dark gothic makeup, but then with half her hair black and half her hair white. It stood out to me because the black and white hair alternated in blocks so it wasn’t just all black on one side and all white on the other. I really like the contrast between the dark makeup and a light hair because it makes the look very striking and powerful; however I think I will stick with using a black wig to keep the whole look very dark and mysterious.
Hair Charts All my hair charts are very similar for this character because I was very sure of the look that I wanted; however I wasn’t completely sure on the length of the fringe or the positioning of the bow. I will be using a black wig for this character, but I am hoping to get a heat resistant one so that I can style it to be pin straight like I want it. I haven’t decided exactly what material I want the bow to be yet, but I will decide after I have selected the outfit as I want it to match. My first hair chart shows very pin straight hair with a harsh fringe that stops just above the eyebrows. I was inspired by the image of the girl with the dark hair above because the fringe made the face look rounder and more doll-like, but the strength of the eyebrows were still there to give a strong and powerful look. This is a very modern way to wear your fringe so it would also add a modern twist. I positioned the oversized bow in the centre of her head and kept it very straight; I think this looks too perfect and too static for this character because she will be screaming and crying out so this very straight bow would not suit her hectic character.
In my second hair chart I kept the hair very straight again and I kept it down. I gave her a longer fringe in this design, that comes over her eyebrows, because I think this fringe is more accurate to the victorian porcelain dolls fringes. This fringe would make the face shape look rounder and therefore more doll-like; however it wouldn’t show the eyebrows which I think could lose some strength in the makeup look. The eyebrows are a very dominant feature on someone’s face and so I think it’s important to keep them visible in the look as I want this character to look very strong and fierce. I placed this bow to one side and on a slight angle to give it a more relaxed look and I much prefer it to the very straight bow; the placement is a lot more fun and cute looking.
This is my chosen hair chart. I kept the hair very straight and neatly brushed, with it fully down and then I made the fringe shorter, stopping just before the eyebrows. As explained above, I want to keep the eyebrows in the makeup look because I think it will give a stronger and more defined look. I will make the eyebrows black to match the hair colour which I think will look very striking. I have also decided to place the bow on one side and at an angle to give a more fun and playful look and to make it look less static.
Making my Bow I decided to make my own bow so that it looked exactly how I wanted, with the right size and material used. I will take inspiration from the YouTube video I found below to help me.
I followed the YouTube tutorial when making my bow, but I added extra material on top to give it a different texture. I first used a stiffer material for the base of the bow, just like she did in the tutorial. I folded the black material in half to the size I wanted, sewed all round the edges leaving a small hole and then pulled the material through the hole to give a cushion like shape. I then used black thread to gather the centre of the square shape. I added some thin mesh material on top, gathered the middle to make a bow shape and then laid it on top of the bow. I finally added some elastic to keep it in place and cover the thread. I am really happy with how it came out because it looked very professionally done and the mesh gave it more of a fun texture and shape.
Styling I want this character to look like she was kidnapped when she was out on a night out, so I want her to be very dressed up, in contrast to the more relaxed look of Girl 1. I wanted the styling for this to character to have a slightly victorian theme because I was originally inspired by porcelain victorian dolls and I don’t think the makeup or hair is particularly victorian. I first looked at some all black dresses that I thought would be suitable, however I thought they all looked a bit mature for my younger character. LINDA, 2012. Gothic Victorian Fashion and Clothing. In: Devil Inspired. 10 December 2012 [29 October 2015]. Available from: http://devilinspiredgothicvictoria.blogspot.co.uk/2012/12/gothic-victorian-fashion-and-clothing.html
I was inspired by the image below of a tutu and corset because the corset would add the structured victorian element to the look and then the tutu would add the more doll-like, girly, youthful element to the look. This character is going to be sat and tied up in a ditch so I think the tutu will look really effective if it is spread out all around her. I don’t want to push my model’s boobs up in the corset because my model is still young and I don’t want her to look too slutty or inappropriate. CORSET STORY, 2015. Fashion Corset [29 October 2015]. Available from: http://www.corsets-au.com/black-corset-with-tutu-a3326-black.html
I ordered the corset off Ebay and I ordered the tutu off Claire’s and I’m really happy with both of them.
When creating this storyboard, I wasn’t completely sure how I wanted my fashion film to go, especially not scene by scene; but I thought it would be beneficial to get a rough idea that I can develop and improve on. I didn’t fully complete the whole story board as I’m still unsure of how I want the ending of my film to go and I wanted to do some more research into fashion films and films before deciding this. I didn’t add the lighting in this storyboard either because I need to do some research into how to film at night time. Also please excuse the drawing!
This is the model I will be using for Girl 3. I have decided that she will be the gothic looking character, wearing very dark and mysterious looking makeup and styling; she will be the girl that is screaming out for help. I chose this model because she has very full lips, with a defined cupid’s bow which would be perfect to colour the lips in all one colour. She also has very full cheeks and an overall quite round shaped face which it was the porcelain china dolls were like. I was also interested in her Chinese shaped eyes as they draw attention and add a different look to this character. I chose this model to be the goth as she has very strong and defined eyebrows so I think she will be able to pull off a black wig.
I made a mood board with lots of different images that I found that stood out to me and gave me inspiration. All the eyes are very dark and smokey and sexy which I like and I live how I can be creative with the lips. I am planning on taking inspiration from different aspects of each look to create my own unique look.
My Face Charts My model has naturally very light blue/grey eyes but I wanted a more sexy, dark look so I bought my model some brown contacts to wear. My first face chart looks very messy and smudgy, however this is not how it would look like in real life. I made her eyebrows black and very defined to give her a very strong look. I decided to put black all over the lid and blended into the crease for definition. I smoked this black colour out with a burgundy eye shadow to add some colour; I used this same burgundy colour on the apples of the cheeks to make the cheeks look rounded. I put black along the lower lash line and then smoked it out with the burgundy to mimic the top colouring; however to make the eyes look bigger I added a bright white colour in the water line. I contoured the cheeks with a bit of grey eyeshadow because I wanted to make the cheeks look more defined, but I didn’t want to add any warmth to the look. I like that the contour would give more definition, but looking back at it, it will slim her face down which is not what I want as dolls usually have very round faces will full looking cheeks. I used a matte black all over the lips; however I think if I did this the lips would look too flat and lifeless. I think that the very heavy eyes and very dark lips would look too much and slightly clown like; especially with the black wig and outfit. I therefore don’t want to use this makeup look for my fashion film character.
I really like the lips in this face chart because the ombre of black and burgundy will make her lips look fuller and it adds a subtle amount of colour to the look. I like that I added burgundy glitter to the centre of the lips because it looks fun and will emphasise the plumpness of her lips. I contoured the cheekbones very lightly to give her some definition and didn’t add any blush colour. I think if I wasn’t doing a look related to dolls then I would definitely always contour, however because I want my model’s face to look very plump and doll-like I will only use blush on my final look. I really like how I have just smudged black eye liner around the eyes because it makes them look really defined but not too heavy. In this look I decided to create a new lash line to make her eyes look bigger and more round.
Chosen Face Chart I chose to use this face chart because I have made the makeup look very dark and sexy, but I still have doll aspects to the look. I didn’t contour the face at all, but instead just added a deep burgundy blush to the apples of her cheeks to make them look more round and doll-like. My model has very naturally full lips with rounded cupids bows so I decided to make the lips completely black to show off her plump lips. To keep them from looking flat and to add some fun I added some black glitter to the lips. I think I will just add this to the centre of her lips to make them look bigger; however if this look strange then I will add it to the whole lips. I didn’t want to make the eyes too heavy so I just added some smudged eyeliner around the eyes and smoked the top and bottom lash line with a burgundy shade. I added this burgundy colour all over the lids as a pop of colour when she looks down. I blended a bit of black into the crease to give her some slight definition. I kept the eyebrows black and defined to give her makeup a strong and clean cut look.
I felt like after getting more of an idea of what I wanted my fashion film to be about, I needed to choose the right music. I wanted to find music that was broken up and wasn’t continuously playing. I was initially inspired by the song used in the opening scene of Woman In Black (2012) because it sounded like the music you would have in a dolls house or a musical jewellery box. The sound of a music box is used a lot in horror films, making people associate the sound with danger and tension. I like that it almost sounds innocent and child-like, but that people automatically know something bad is about to happen when they hear it. This inspired me to think of the three girls in the forrest more as puppets or dolls being controlled constantly by the man. I think this adds a really strong message that girls should never just let men control them.
MOVIECLIPS TRAILORS, 2012. The Woman in Black – Opening Scene – Daniel Radcliffe Movie (2012) HD [28 October 2015]. Available from: https://www.youtube.com/watch?v=oCR4tfQBd6w
I found the song Dramatic Story Telling Music created by YouTuber, Nutsie III which reminded me of The Woman In Black song because of the same music box tune. I really like that it has the music box element but then it has more dramatic sections because I can imagine zooming in on one of the girl’s faces, fading in and out in time with the music; however I feel like the song is quite repetitive so I don’t think I would want to use this whole song throughout my film; I would like to incorporate the creepy music box element with another song to make it more interesting and varied. I may add this music at the very beginning of my film when I introduce the girls to give the viewer a hint that these girls are being treated as dolls, but then fade into the more dramatic music shown above.
I wanted to find a song that incorporated both the music box element, but also a more dramatic song. I automatically thought of the Dead Silence soundtrack. It starts off very slow, with just the music box playing, but then slowly builds up the tension to a louder, more intense song. I love that the song changes throughout, keeping it from being repetitive and boring. I considered using this song for my fashion film, however I felt that because it was so well known, the song would just remind my viewers of that film and it will distract them from the film. I therefore decided to have a look around for a song similar to this, that people wouldn’t recognise. The Dead Silence soundtrack is played between 0-1″13′.
I found the song Rising From The Depth by Sub Pub Music and I chose the 2014 Epic Dark Sinister Hybrid Industrial Suspense. This song does not include the music box element; however I could add it in over the top of certain sections so that it is less obviously all about dolls. I really liked how the music started off very eery and how it built up to get louder, that sounded like the wind. I then like how it kept starting and stopping as I feel like that would put the viewer more on edge because it’s not obvious what’s going to happen next which is also what I want to reflect with my content. I think the overall song definitely sounds scary and sinister which is exactly what I wanted.
WARRIOR FROM HEAVEN, 2014. Colossal Trailer Music – Rising From The Depth (2014 Epic Dark Sinister Hybrid Industrial Suspence [28 October 2015]. Available from: https://www.youtube.com/watch?v=ZtKjg9GSIT0
Kanye West was interviewed by Lou Stoppard for SHOWStudio and I found a lot of what he said inspiring, but I also sternly disagreed with some of his opinions, particularly on race.
Kanye talked about how it is your responsibility as artists to speak your truth and give your truth at that time which I think means that you should always produce things that you believe in and that you believe are meaningful and powerful, instead of being convinced by others that it is wrong or too abstract. He also said that you shouldn’t be afraid of changing your mind and that you should always look outside the box which inspired me to always push that little bit further with your creativity and that it is only natural to change your mind, so don’t be afraid to follow or adapt towards new ideas. Kanye advices that you should never be afraid to branch out of your artistic area and that it is great to be skilled in different areas, e.g. music and fashion. I agree with this as I look at music, fashion, painting etc. all just as different art forms and I think you can definitely link them together, for example, music videos or fashion films. Kanye does, however, think that fashion is the highest form of art because there is so much energy and passion surrounding it. I agree with this, closely followed by music, because everyone wears clothes and decides what looks good with what so everyone can relate and has opinions on it.
Kanye said that he decided to define himself as a creative genius because otherwise he feel that other people will define him as a ‘celebrity’ or a ‘rapper’ which he feels have many negative connotations linked with them. I can see where he is coming from, however he definitely does fit into the category of a celebrity and a rapper, so he can’t really complain if people refer to him as one. I also think it is a very big statement calling yourself a genius because the word genius means you are exceptionally creative or intelligent. However he clearly thinks very highly of himself as he says that he thinks he is either on the same level or a higher level that Picasso, who was one of the greatest and most influential artist of the 20th Century. I personally found this uncomfortable to watch because I think many people would disagree with this heavy statement and would laugh at it.
Kanye says he never experienced doubt, even as a young child, which I find hard to believe because, as human beings, you always question yourself and think you could have done something better or differently, so I think he is just saying that to try to create a strong and untouchable image of himself so people think they can’t break him down with their opinions or criticisms. Later on in the interview he says that he thinks he would be even more dangerous and powerful if he had stayed in art school because he would have so much more knowledge behind him. I agree that he may be more successful because he would understand more things and know more of fashion and art’s history. I also felt that he struggled to express himself literally in this interview at points because he had to take long pauses and he said a lot of ‘errrrm’ and ‘uuummm’ which made him seem unsure of what he was trying to say or how to say it.
I think it was very unfair when when he was asked a question by a fan and he said ‘wait a second, is that a white person that said that?’ because it shouldn’t matter which race said what, we should all fall under the same category. I felt like he kept saying that everyone is equal and that other people are racist, when actually he was the one separating the races, when asking questions like the example above. Kanye said that he feels that if you are born white you get an automatic advantage, however I completely disagree with this. I think that is just how he sees it. The Guardian states that ‘white British children from deprived areas appear to be less resilient to the effects of poverty than other ethnic groups, who perform better at school despite similar levels of deprivation’. This shows that Kanye’s comment was not researched and untrue. This could however be because white people that were born in the UK automatically get free education and so they may take it for granted, meaning they wouldn’t do the homework or would misbehave in lesson. Whereas someone born in a different country would have had to fight for their free education and so would appreciate it more and take full advantage of the opportunity.
Kanye makes a point saying ‘anyone that is criticising most likely.. ..saw the 360s and acted like they didn’t like them because they’re racist and they’re discriminatory’. I think this statement is completely unfair because, speaking as a white person myself, I don’t care if a white person of a black person has made a particular pair of shoes. If I like them then it’s because of their design, not because a black person made them. This was another example of when Kanye completely separated each race in an unfair and unnecessary way. I also think it is very naive to think that the only reason anyone would criticise his shoes is because of his race; he is almost saying that there is no way there would be any other reason that people wouldn’t love my shoes. I understand that white people were very unfair to black people in the past, but the past is the past, and I think people need to let go of it and move on. I think that the majority of white people don’t see black people as any different, but it is the black people that are holding on to the negative history. An example of this is when two boys got arrested for dressing up as two black men; whereas if two black boys dressed up as white people then everyone would just find it funny and I guarantee you that hardly any white people would be offended by it.
Even though I disagreed with many of the things Kanye said, I do admire how much he believes in himself and how passionate he is about his work and family. I found it a real eye opener when he said ‘to let your life be controlled by public opinion is like asking to sit in traffic for the rest of your life’. I found this inspiring because he says that you can’t be controlled by other people’s opinions of you and your work and you just have to do what you think is right and what you believe in.